
Installation Tips
Introduction to Artificial Turf Installation
Installing artificial turf is an excellent way to create a beautiful, low-maintenance, and durable outdoor space. Whether you’re looking to transform your backyard, create a pet-friendly area, or design a putting green, proper installation is key to ensuring your turf looks great and lasts for years. While it might seem straightforward, there are several critical steps to follow to avoid common pitfalls. This guide will walk you through essential tips to help you achieve a professional-looking result.
Why Proper Installation Matters
Artificial turf is designed to withstand heavy use and varying weather conditions, but its longevity and performance heavily depend on how well it is installed. A poorly installed turf can lead to issues like poor drainage, uneven surfaces, premature wear, and even safety hazards. By taking the time to prepare correctly and follow best practices, you can enjoy a lush, realistic-looking lawn that requires minimal upkeep.
Benefits of a Well-Installed Turf
- Enhanced durability and resilience
- Superior drainage preventing water pooling
- Consistent and even surface for safety and aesthetics
- Long-term cost savings by avoiding repairs or replacements
Pre-Installation Planning and Preparation
Before you begin, careful planning is essential. Start by measuring the area where you plan to install the turf. Consider the purpose of the space—will it be used for recreation, pets, or purely decorative purposes? This will influence the type of turf you choose and how you prepare the base.
Choosing the Right Artificial Turf
Selecting the appropriate turf for your needs is crucial. Factors to consider include pile height, density, color, and infill options. For high-traffic areas or homes with pets, opt for a durable, permeable turf with good drainage. If aesthetics are your priority, look for a product with a mix of green tones and thatch for a natural appearance.
- For play areas: choose softer, shorter piles with good shock absorption
- For pet zones: select turf with efficient drainage and antimicrobial properties
- For decorative lawns: focus on visual realism and UV resistance
Gathering Tools and Materials
Having the right tools on hand will make the installation process smoother. You’ll need items such as a shovel, rake, compactor, utility knife, tape measure, and seam tape if joining multiple sections. Also, ensure you have enough turf, base material (like crushed rock or decomposed granite), and infill.
Step-by-Step Installation Guide
Follow these steps to install your artificial turf like a pro. Remember, attention to detail during each phase will pay off in the finished product.
1. Remove Existing Grass and Vegetation
Begin by clearing the area of any existing grass, weeds, or debris. Use a sod cutter or shovel to remove the top layer, ensuring you go deep enough to eliminate roots that could regrow and disrupt your turf later.
2. Grade and Level the Surface
Create a smooth, sloped surface to promote drainage. A slight grade of about 1-2% away from structures is ideal. Use a rake and leveling tool to eliminate any high or low spots, as an uneven base can lead to visible imperfections and water pooling.
3. Install a Weed Barrier
Lay a geotextile weed barrier over the prepared soil. This prevents weeds from growing through your turf while still allowing water to drain. Overlap seams by at least 6 inches and secure the edges.
4. Add Base Material
Spread a layer of base material—typically 3-4 inches of crushed rock or decomposed granite—over the weed barrier. Compact it thoroughly using a plate compactor to create a firm, stable foundation. This step is critical for preventing settling and ensuring proper drainage.
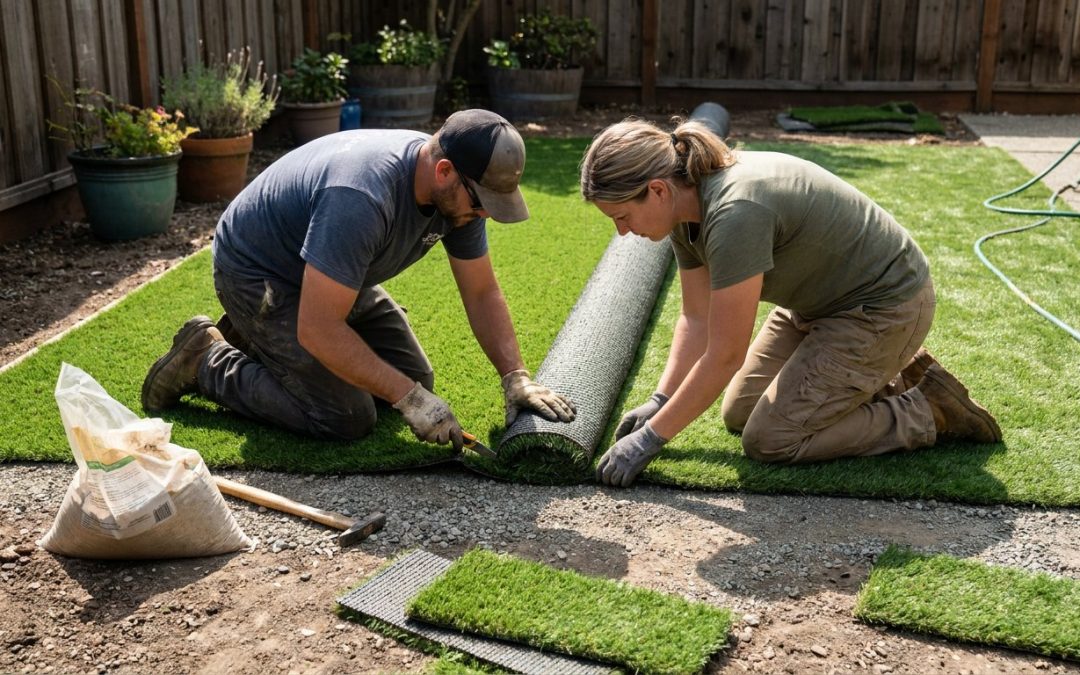
5. Roll Out and Trim the Turf
Unroll your artificial turf over the compacted base, allowing it to acclimate for a few hours if it was stored rolled. Trim edges to fit your space using a sharp utility knife, leaving a slight overhang for final adjustments.
6. Join Seams (If Necessary)
If your project requires multiple rolls of turf, seam them together carefully. Align the pieces so the blades face the same direction, use seam tape and adhesive, and ensure a tight, invisible bond.
7. Secure the Edges
Use landscape spikes or nails to secure the perimeter of the turf every 6 inches. Avoid overdriving nails, which can cause puckering. For curved edges, make small cuts for a smooth fit.
8. Apply Infill
Spread infill material (such as silica sand or crumb rubber) evenly across the turf. Use a drop spreader or broom to work it into the pile, which helps the blades stand upright, adds weight, and improves durability.
9. Brush and Final Inspection
Finally, brush the turf with a power broom or stiff-bristle brush to lift the fibers and distribute infill evenly. Walk over the entire area to check for soft spots or imperfections, making adjustments as needed.
Common Mistakes to Avoid
Even with careful planning, it’s easy to make errors during installation. Here are some common pitfalls and how to steer clear of them.
- Inadequate base preparation: Skipping proper compaction can lead to an uneven surface and poor drainage.
- Poor seam joining: Visible seams detract from the natural look; take time to align and bond sections correctly.
- Over-trimming: Cut conservatively—you can always trim more, but you can’t add back.
- Using incorrect infill: Choose infill suited to your turf type and usage to avoid compaction or wear issues.
Maintenance Tips Post-Installation
While artificial turf is low maintenance, a little care will keep it looking its best. Regularly remove debris, rinse occasionally to prevent dust buildup, and brush the fibers to maintain loft. For pet owners, prompt cleaning and rinsing are recommended.
Seasonal Care
- In fall, clear leaves to prevent staining and blocking drainage.
- In winter, remove snow gently without sharp tools to avoid fiber damage.
- In summer, occasional rinsing can help cool the surface and remove pollen or dust.
When to Call a Professional
While DIY installation is possible for smaller areas, complex projects or large spaces may benefit from professional expertise. If you’re unsure about grading, seam joining, or choosing materials, consider consulting an expert. The Paver and Turf Store offers local knowledge and experience to ensure your installation is flawless—feel free to reach out for personalized advice or a quote.
Conclusion
Installing artificial turf correctly requires patience, attention to detail, and the right materials, but the result is a beautiful, functional outdoor space that will serve you well for years. By following these tips—from planning and base preparation to securing edges and adding infill—you can achieve a professional-grade installation. Remember, taking shortcuts can lead to problems down the road, so invest time in doing it right the first time. Happy installing!