
Pavers
Transforming your backyard into a beautiful, functional space doesn’t have to break the bank or require professional help. With the right planning, materials, and a bit of elbow grease, you can create a stunning paver patio that enhances your outdoor living experience. Pavers offer incredible versatility, durability, and aesthetic appeal, making them a favorite among DIY enthusiasts. Whether you’re looking to build a cozy fire pit area, an elegant dining space, or a simple path through your garden, these DIY paver patio ideas will inspire your next project.
Why Choose Pavers for Your DIY Patio?
Pavers are an excellent choice for DIY projects due to their flexibility, strength, and wide range of styles. Unlike poured concrete, pavers allow for easy repairs—if one gets damaged, you can simply replace it without redoing the entire patio. They come in various shapes, sizes, colors, and textures, enabling you to customize your design to match your home’s architecture and your personal taste. Additionally, pavers provide excellent drainage and are resistant to cracking under temperature changes, making them a practical and long-lasting option.
Planning Your DIY Paver Patio
Before you start digging, careful planning is essential for a successful paver patio. Begin by determining the size and shape of your patio based on how you plan to use the space. Consider factors like sun exposure, proximity to your home, and any existing landscape features. Sketch a rough design, noting measurements and the number of pavers you’ll need. It’s also crucial to check local regulations regarding property lines and permits. Proper planning ensures your project goes smoothly and meets your expectations.
Choosing the Right Pavers
Selecting the right pavers is key to achieving the look and functionality you desire. Common options include concrete pavers, which are affordable and come in numerous styles; brick pavers, offering a classic, timeless appeal; and natural stone pavers like flagstone or slate for a more rustic or high-end finish. Consider the patio’s purpose—for high-traffic areas, choose thicker, more durable pavers. Also, think about color and pattern; lighter colors can make a small space feel larger, while darker tones create a cozy atmosphere.
Essential Tools and Materials
Gathering the right tools and materials beforehand will make your DIY project much easier. You’ll need a shovel, rake, tamper, level, measuring tape, and safety gear like gloves and goggles. For materials, besides the pavers themselves, you’ll require gravel for the base layer, sand for leveling, and edge restraints to keep everything in place. If you’re unsure about the best products for your specific project, consulting with experts at a place like The Paver and Turf Store can provide valuable local insight and recommendations.
DIY Paver Patio Design Ideas
Now for the fun part—exploring design ideas that can turn your backyard into an oasis. From simple patterns to intricate layouts, the possibilities are endless. Here are some popular and creative DIY paver patio ideas to get you started.
Classic Herringbone Pattern
The herringbone pattern is a timeless choice that adds visual interest and structural stability to your patio. By arranging rectangular pavers at 45-degree angles, you create a zigzag effect that is both elegant and durable. This pattern works well with brick or concrete pavers and complements traditional and modern homes alike. It’s a bit more challenging to install due to the precise cutting required, but the result is well worth the effort.
Circular Patio with a Fire Pit
For a cozy gathering spot, consider building a circular patio centered around a fire pit. Circular designs create a natural flow and intimate atmosphere, perfect for entertaining guests or enjoying quiet evenings outdoors. Use curved pavers or cut standard ones to fit the shape. Surround the fire pit with comfortable seating, and you have a perfect year-round retreat. This design is ideal for larger yards but can be adapted to smaller spaces with a compact layout.
Mixed Material Patio
Combine different types of pavers or integrate other materials like gravel or turf for a unique, textured look. For example, use large stone slabs as the main walking area with smaller pebbles or grass between them for a rustic, natural feel. Alternatively, mix colors and sizes of concrete pavers to create a custom pattern that reflects your style. This approach allows for creativity and can help define different zones within your patio, such as a dining area versus a lounging space.
Pathway and Stepping Stone Design
If a full patio isn’t what you need, a simple paver pathway or stepping stones can enhance your garden or connect different areas of your yard. Use irregularly shaped natural stones for a organic look or uniform pavers for a more structured path. This project is less intensive than a full patio but still adds significant charm and functionality. It’s also a great way to practice your paver-laying skills before tackling a larger project.
Step-by-Step Installation Guide
Once you’ve chosen your design, it’s time to get to work. Follow these general steps for a successful paver patio installation. Remember, preparation is the most critical phase.
1. Prepare the Area
Mark the patio outline with stakes and string. Excavate the area to a depth of about 6-8 inches, ensuring the ground is level and slopes slightly away from your house for drainage. Remove any grass, roots, or debris.
2. Install the Base
Fill the excavated area with a 4-5 inch layer of gravel, then compact it with a tamper. Add a 1-2 inch layer of sand on top, and use a board to screed it smooth and level. This base provides stability and prevents shifting over time.
3. Lay the Pavers
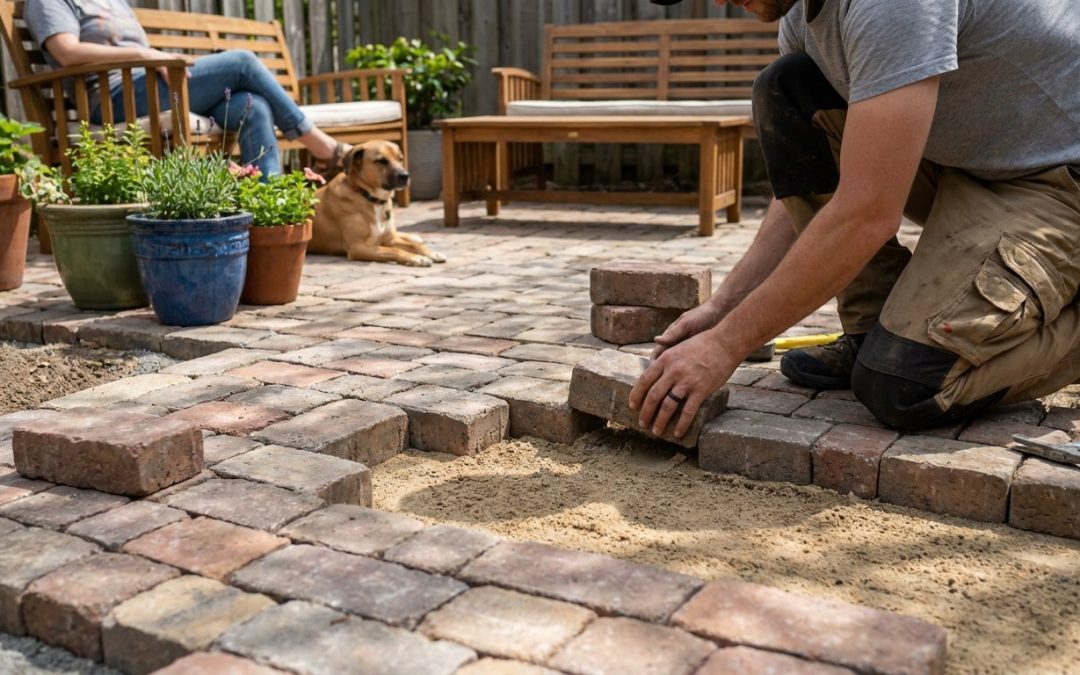
Start laying pavers from one corner, following your chosen pattern. Use spacers if necessary to maintain even gaps. Cut pavers to fit edges using a chisel and hammer or a rented saw. Work carefully to keep the layout consistent.
4. Secure the Edges
Install edge restraints around the perimeter to hold the pavers in place. These can be plastic or metal strips anchored into the ground. This step is crucial for preventing the patio from spreading or sinking at the edges.
5. Apply Joint Sand
Spread polymeric sand over the entire patio surface and sweep it into the joints between pavers. Use a plate compactor to vibrate the sand down, then add more sand as needed. Lightly mist the area with water to activate the sand, which hardens to lock the pavers together and deter weeds.
Maintenance Tips for Your Paver Patio
To keep your DIY paver patio looking great for years, regular maintenance is simple but important. Sweep debris regularly and rinse with a hose occasionally. For deeper cleaning, use a pressure washer on a low setting to avoid displacing the joint sand. Replenish joint sand every few years if you notice erosion or weed growth. Sealing the pavers is optional but can enhance color and protect against stains, especially for natural stone.
Conclusion: Your Dream Patio Awaits
Building a paver patio yourself is a rewarding project that adds value and enjoyment to your home. With these ideas and guidelines, you’re well-equipped to create a beautiful outdoor space tailored to your needs. Remember, taking your time with planning and execution will yield the best results. If you need materials or advice, don’t hesitate to reach out to The Paver and Turf Store for assistance. Now, grab your tools and start turning your backyard dreams into reality!